Hello Beauties,
I am so extremely obsessed with lip makeup its becoming out of hand LOL! I buy way too much lipliner but when you discover the amazing tricks you can do with lipliner, you too will be addicted!
Lip contouring helps you achieve that "lip job" look that so many go into plastic surgery to do. This technique gives you a more natural "fake lip job" without having a permanent job done to you.
Start by lining your lips all over with a thin line, then fade in the corner of the lip, smudging the colour inwards. Draw contour lines on the bottom and top lip this helps by making the lip look more plump and larger. Then fill in with a lighter shade of liner or lipstick to blend the contour altogether!
I used in this pic NYX Mahogany to line my lips then NYX Soft Brown to blend it all
Hope you enjoyed this post :)
Yara
Belle La Yara
Beauty Comes From Within
Tuesday, April 28, 2015
Thursday, March 19, 2015
The Actual Lip Liner Kylie Jenner Uses
Kylie has stolen the beauty craze with all the trends she's setting. From what lip liner she's using to what bronzer she contours in. She is the largest makeup trend setter this year!
I love her style of makeup it's definition on your faces focal points: lips, eyes, and cheekbones. So I've been searching for months for the perfect shade to match her "popular" lip liner look and I believe I have found THE ONE!
I researched more on what it's the exact liner she uses, and Kim Kardashian has spoken out and has said she's seen Kylie go between MAC Soar and MAC Spice. She lines and fills in her lips and leaves it at that.
I didn't think soar was the color because it seemed so pink but then I tried it out and boy! Did it look like her lips were on my face! Lol it's literally the exact shade!!! I'm soooo happy now 😃😃
Here are a few swatches
Monday, March 9, 2015
Soliel Tan De Chanel Bronzer Review
This product has become an essential staple in my makeup collection and is worth every dollar spent. I read many reviews, watched many videos and heard many amazing things about this bronzer that it took me over a year to finally purchase it.
I purchased it in December 2014 and now used it for a good couple of months to give an accurate review of this product. At first I thought that it was orange-y for my skin tone but I walked around in natural lighting and I fell in love.
You only need a small amount to give a nice natural glow to your skin and blends smoothly. I use a stippling brush to apply the bronzer onto my contours. It isn't a matte bronzer but it isn't heavily sparkly, it has just the right amount to give a soft glow to the skin.
It is pricey because hello its Chanel, but it is worth it and I know it will last for a long time! When it comes to any products you should do a general research and see if it will be worth it for you. Dont just buy it out of impulse! (I'm guilty for such things!)
xo,Yara
Thursday, January 15, 2015
How To Strengthen Nails
Hello Beauty Lovers,
I have searched high and low for a way to strengthen my nails after having fake nails. Acrylic nails is the worst thing ever but its just so pretty!! And don't be fooled by shellac being a healthier option, as it may not make your nails as weak as applying fake nails, if you have a weak nail bed then the shellac will do more damage to your nail rather than help it.
So after staying away for months from the nail salon I tried many home remedies to strengthen my nails, from eating more vitamin D, not painting my nails, and taking skin hair nail pills. Nothing worked until I began doing research and read about Coconut Oil.
Coconut Oil is such a healthy oil to use on skin, hair and nails because it provides deep moisture. Weak nails result from a weak nail bed so not taking care of your cuticles and keeping that area moisturized will create an unhealthy foundation. Applying Coconut Oil onto your nails every night before going to bed will moisturize and feed into your nail bed helping to strengthen your nails.
Ive noticed the biggest difference once I began using Coconut Oil but it is a process that you need to maintain. Not only do I apply Coconut Oil but I also file my nails every couple days, you're shaping and strengthening your nail by filing it a little. Think of it as a split end hair trim but for your nails, you file down just a layer of the nail to help promote more growth and strength.
This is a routine in which you need to stick to in order to see results and its so easy and affordable that adding this step to your daily routine won't be an issue!
Hope you enjoyed this post,
Yara <3
Monday, November 17, 2014
Feeling Crampy?
Menstruation is seriously the most annoying, most painful (okay maybe not mostttttt painful but still so painful!) torture us girls have to endure every single month! And yes I'm writing this post while I'm on the red!
Well I have a few things to share with you on how to ease up the pain and torture of this fabulous gift.
Motrin
This is my best friend, targets menstrual pain and nothing else works for me. Advil and Tylenol can't do anything while I'm on my P! Pop 2 pills of Motrin and in probably 30-45 I'll start feeling less needles being stabbed in my uterus:)
Cinnamon Leaf Essential Oil
Newly discovered trick, but smelling this oil you begin to feel more relaxed and less tense. I actually feel less pain while smelling the scent. Thing is you have to keep smelling it if you want to feel relaxed. Because when I stopped smelling it I started feeling the pain come back. What I do is lay down and just smell the oil and it starts calming you down and the pain lessens as you keep inhaling.
Green Tea
This tea is just a fighter, helps with everything and just makes you feel so much more relaxed. Especially resting the heat of the cup on your stomach just makes the world of pain spin less!
Pillows
This is just a gift, pillows are my best friend when I'm dying of cramps. Plomp onto your bed and squeeze pillows under your belly and just scroll through Instagram is the lifeeee lol!
Labels:
beauty blogger,
cramps,
girls,
help,
menstruation,
pain,
Period
Friday, November 7, 2014
Everyday Loose Curls
Hello Girlies,
Loose curls are the most effortless yet put together hair looks ever. You can look like a bohemian beach babe and with that same hairstyle class it up to a CEO gal.
I love love love loveeeee my Nume Curling Wand, I got it at Winners it came in a 3 pack, 1/4 in, 1/2in and 1.5in wands. And they're interchangeable so it just comes with one base and then the 3 different wands. I got it for 70$ I believe which is an amazzzzzing deal for 3 different sized wands!! Especially by Nume:)
How I achieve everyday curls is by having semi straightened hair, I naturally have curly/wavey hair so I just try to tame it down with my straightener and make it more easier to work with to curl.
Now if I want to achieve the very loose waves then I use the 1.5 in wand but I usually like a little more bounce so I will take thicker sections in the bottom of my hair and curl with the 1in wand.
Towards the middle and top of my hair I take smaller pieces. I alternate in the direction I curl, so I'll curl toward my face and outwards.
When I'm done which is like 25 min with this curler ( it's awesome because my hair is thick) I will flip it down and just shake my hair, it adds volume and I run my fingers through to loosen it up voilá my everyday curls :)
Tuesday, October 21, 2014
My Top 5 Makeup Brushes
Hello Beauties,
If you're like me I loveeeee makeup brushes, if I had all the money in the world boy would I splurge on some nice brushes. But I'm a student on a budget so I get what I can. For makeup brushes you need to have the mindset that they are an investment into your beauty regime. You want quality, results and ease therefore, it means taking some time to properly research and save up for the right tool. My motto for any purchase is Quality over Quantity and that goes for many things, but when it comes to beauty tools it should be well thought out.
In the beginning of getting into makeup in my mind I was like, " Why the hell would I spend 40-50$ on a single brush when I can buy a purse with that". But you got to think of it as an investment into your look, you want flawless results you need to invest in quality tools; plus they last forever with the proper care.
So here are my top 5 brushes:
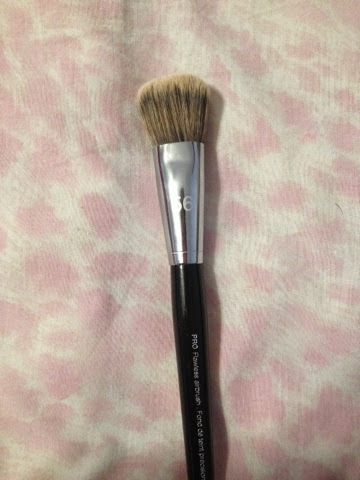
1. Sephora Pro Flawless Airbrush 56- 40$
Buffs your foundation beautifully and doesn't leave any lines- I love this brush
2. Sephora Pro Flawless Concealer 57-30$
Amazing at blending in concealer under the eye- can't live without this brush
3.Sigma Large Angles Contour F40- 22$
I think this is my favourite brush of them all, its the best at applying blush/bronzer so effortlessly
4.MAC Flat Shader 239- 25$
Great to apply an even amount of colour all over the lid
5. MAC Blending Brush 217- 24$
Best blending brush I have ever tried, so easy and perfect size for any eye.
Subscribe to:
Posts (Atom)


